Grounding question
Moderated By: mods

Grounding question
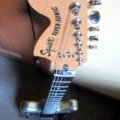
Hey guys. Sorry I haven't been around much lately; I've been super busy working/recording. Anyway, I've got the Mockingbird disassembled again, this time to slop shielding paint into it, and I have a possibly-very-elementary question. The shielding paint I bought came with a ground wire and lug, but I'm not 100% sure what to attach it to. The existing ground wire was (a) really nastily frayed, so I'm not too keen on reusing it, and (b) soldered to the back of the tone pot, then disappeared into a tiny hole in one side of the control cavity. It's possible it's grounded to one of the bushings for the bridge posts, but I don't know for sure, and even if it is, I don't like my chances of getting the new wire through the same route. Do I need to contrive some way of doing that anyway? Should I wrap the existing damaged ground wire in electrical tape and hope for the best? Or is it enough just to screw the lug for the new wire anywhere that's convenient in the (now shielded) control cavity?

That previous ground wire was probably touching one of the bridge posts which is what I would try to do. I've seen some tricks on getting bridge bushings out of guitars with a screw and the posts:
[youtube][/youtube]
If you're not up to try that, grounding the pots and jack to the shielding should work out but might cause issues when you're touching the bridge. Might not, I don't know for sure.
[youtube][/youtube]
If you're not up to try that, grounding the pots and jack to the shielding should work out but might cause issues when you're touching the bridge. Might not, I don't know for sure.
-
honeyiscool

- .

- Posts: 2072
- Joined: Tue Feb 01, 2011 11:36 pm
- Location: San Diego, California
First, you paint all the cavities with conductive paint. You then screw the grounding lug into a surface painted with conductive paint so as to make sure you create a cage out of the conductive paint you just slopped on. Obviously be smart about where you screw the lug in. You're going to want to use a thick but short screw, like a #8 x 1/2" screw or so. And you're going to want to screw it in such a way that it doesn't poke out the other side and doesn't hit anything important. A Mockingbird has rear routing, so the place I'd choose would be inside the routing, on the topmost wall, facing an imaginary point between the tailpiece and the strap button. With a short enough screw and the correct angle, you can be absolutely sure that you own't hit anything important.
Anyway, so let's say you got the lug installed. I'd actually connect the lug straight to the bridge/talipiece ground, and then extend a wire from the lug to the back of a pot. That's how I prefer to do it, but there are many other options, and you know what? Honestly, on a rear route guitar, as long as you have painted the control cavity, you don't even need the lug. The lug is more for connecting multiple different control cavities like on a Jaguar.
As for grounding to bridge/tailpiece, do try to reuse the wire if at all possible but it's not too hard to install a new grounding wire. You should be able to figure out where the existing wire is going to if you follow the angle of the hole the wire is going through. Chances are it's going to be the tailpiece, but it might be the bridge. Either way, the concept is the same. You need to extract the threaded bushing that the wire is connected to. You will cause damage to your guitar if you use the wrong tools (like pliers) to extract the bushing, but the thing is, it's pretty easy to do it safely. You just need to reuse the post that normally screws into the bushing. However, put something under it so that it prevents the post from screwing all the way in. A small machine screw or a nut that fits would work. If one's not enough, put a bunch of things in there. You want just enough things such that when you screw the post into the bushing, it catches into the threads but eventually is prevented from turning further. At that point, when you screw the post further, the torque will be converted into the bushing being gently pushed out with no chance of damaging anything. Another way to do this is to take a trip to the hardware store and figure out the size of the thread of the tailpiece (or bridge) post. When you've figured out the size, get a really long hex bolt (say 2" or longer) with the same thread. Now take that home and start tightening it into the bushing. As you tighten, you will eventually bottom out the routing, and as you tighten further, it will pull out the bushing pretty easily.
Kicking and squealing Gucci little piggy.
One more question on this. I've got a Dream 90 in the neck position, Mean 90 bridge, 1 volume, 1 tone, and a 3-way toggle. Previously, I had the ground wire from the neck pup soldered to the back of the volume pot and the ground wire from the bridge pup soldered to the ground lug of the toggle. Looking at a comparable diagram, I'm seeing both pickups grounded to the back of the volume pot, and a separate ground wire going from there to the toggle. Is there any advantage to doing it one way vs. the other?
-
honeyiscool
- .
- Posts: 2072
- Joined: Tue Feb 01, 2011 11:36 pm
- Location: San Diego, California